

Case 1.2 Via Gene Disease Pair (ClinVar, GWAS and dbSNP)*
*Click here for explanation of ‘Gene Disease Pair’ class
1. Go to the TargetMine main page and click the ‘Query Builder’ tab.
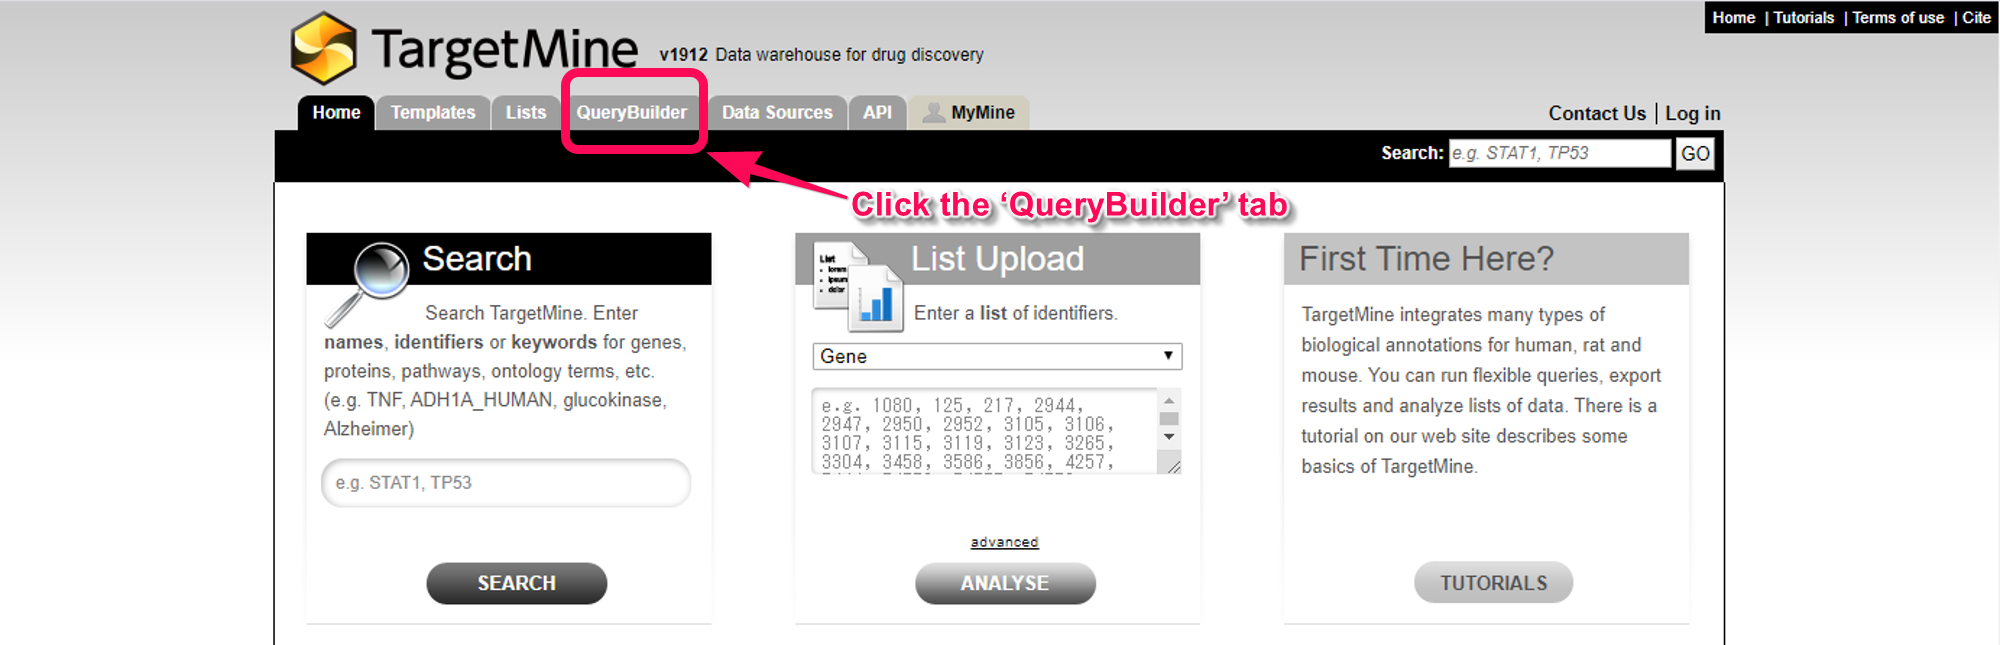
Find the ‘Query Builder’ tab in TargetMine
2. Select the ‘ChEMBL Compound’ and click the ‘Select’ button to begin a query.
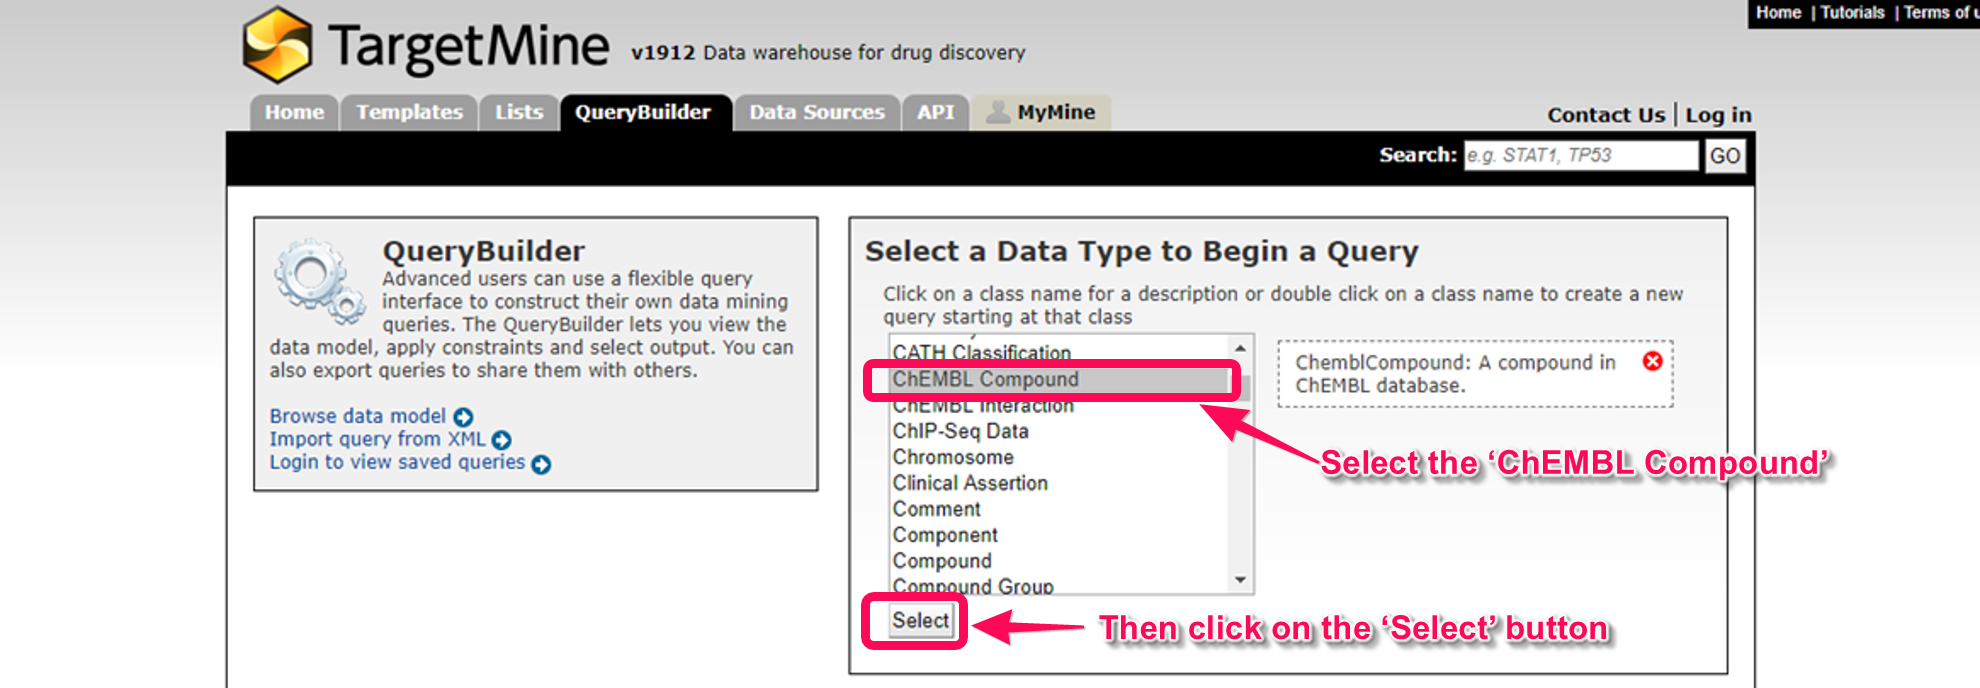
Select the ‘ChEMBL Compound’ and click the ‘Select’ button.
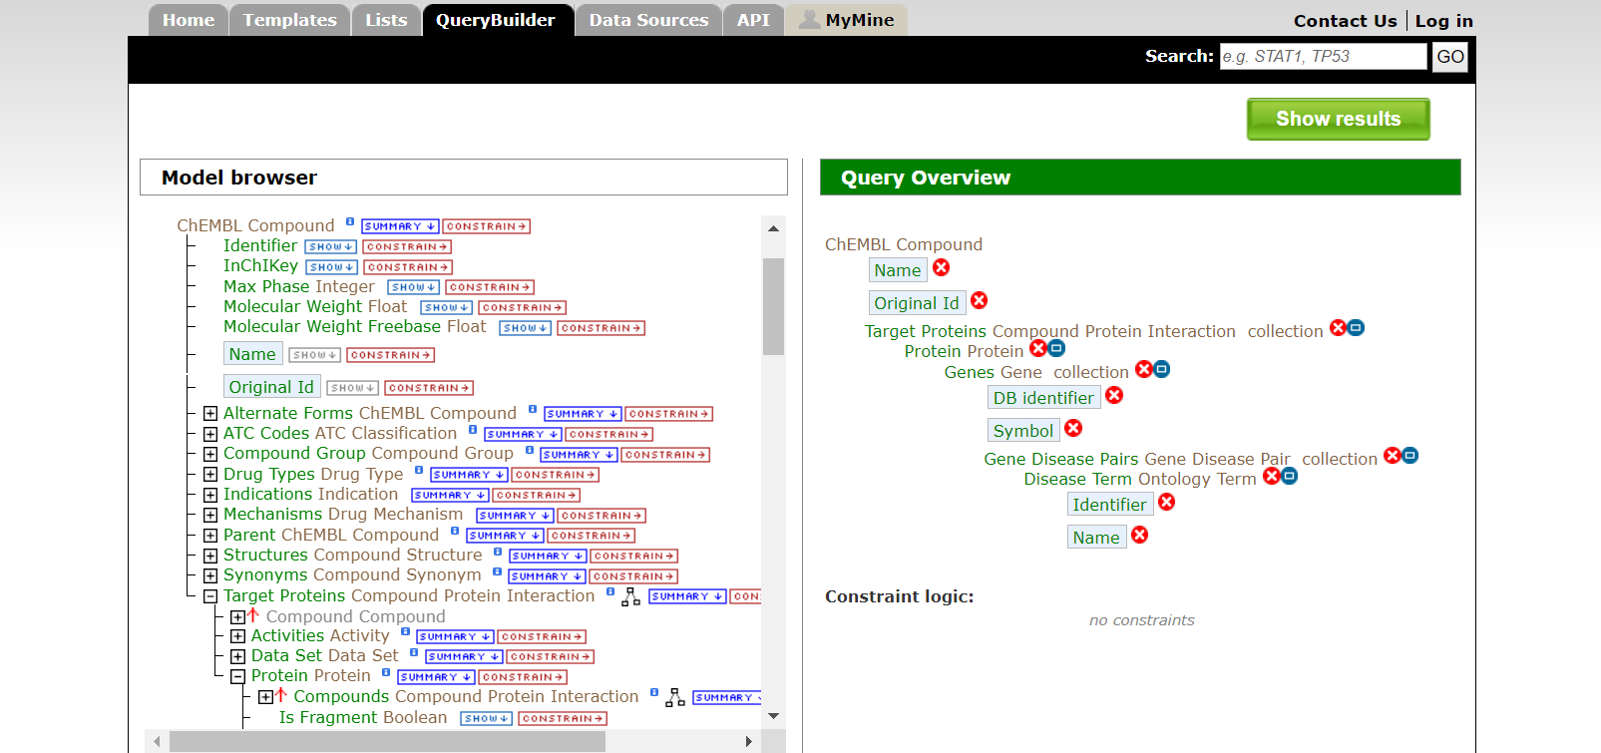
3. The ‘Model browser’ displays TargetMine data model in a tree structure. If the user clicks on the plus sign (+) next to the class name, a list of sub classes is displayed.
For example, if we start from the ‘ChEMBL Compound’ root class, and click next to ‘Target Proteins’, the sub classes ‘Activities’, ‘Data Set’ and ‘Protein’ will be displayed.
To reach ‘Disease Term’, you have to go from ‘ChEMBL Compound’, ‘Target Proteins’, ‘Protein’, ‘Genes’, ‘Gene Disease Pairs’, and finally, ‘Disease Term’.
(Please see step 3 in the case 1.1 for an example of where to click.)
4. You can select the fields to add the result table by clicking on the ‘SHOW’ link. For example, let’s select ‘Name’ and ‘Original Id’ in ‘ChEMBL Compound’ class, ‘DB identifier’ and ‘Symbol’ in ‘Genes’ class, and ‘Identifier’ and ‘Name’ in ‘Disease Term’ class. (Please see step 4 in the case 1.1 for an example of where to click.)
Selected fields are displayed in the ‘Query Overview’.
5. In this tutorial, we will put the restrictions on retrieval range in the ’ChEMBL Compound’ for immediate results. When we click on the ‘CONSTRAIN’ link of ‘Name’ in ‘ChEMBL Compound’ class, the ‘Constrain’ window will pop up. For example, you can input the ‘acetaminophen’ and click the ‘Add to query’ button.
(Pleese see step 5 in the case 1.1)
Unrestricted retrieval will apply a high load to the server, therefore, let us know before submitting your job.
You can download an unrestricted result table from here.
6. In the ‘Fields selected for output’ area, we can change the order of the fields in the column of the results table by drag and drop the field boxes.
(Pleese see step 6 in the case 1.1)
7. Click on the ‘Show results’ button to see the query results.
(Pleese see step 7 in the case 1.1)
8. To see and save the query result, please see step 8 and 9 in case 1.1.
